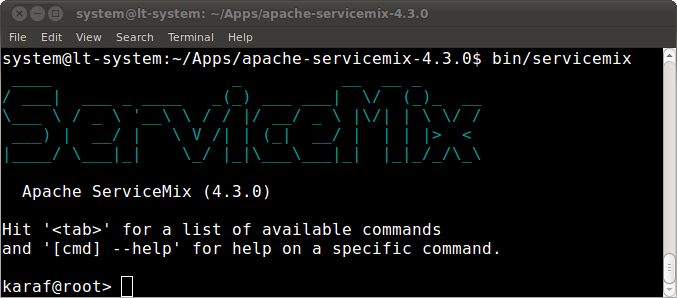
[원본 출처] http://servicemix.apache.org/docs/5.0.x/camel/index.html


Apache Camel is a powerful open source integration framework based on known Enterprise Integration Patterns with powerful Bean Integration.
Apache Camel은 파워풀 빈 통합을 가지고 엔터프라이즈 통합 패턴(EIP)으로 알려진 것에 근거한 파워풀한 오픈 소스 통합 프레임워크이다. 

Camel in ServiceMix(ServiceMix 의 Camel)

In ServiceMix, Apache Camel is like our swiss army knife for creating integration solutions. It allows using XML or a Java/Scala-based DSL to express your routes, comes with over 70 optional components, has powerful and versatile Java bean integration, error handling, ... and tons of other features.
ServiceMix에서 Apache Camel이 통합 솔루션을 생성하기 위해 스위스 육군 칼(맥가이버칼) 같다. 그것은 XML 또는 Java/스칼라 기반 DSL을 당신의 라오터를 표현하기 위해 사용 하는 것과 70개 이상의 부가적인 컴포넌트들을 함게 제공하고 강력하고 다양한 Java 빈 연계를 가지고 에러를 핸들링하고 그리고 다른 기능의 톤을 허용한다.

Apache Camel is installed by default if you first start the container. We also have out-of-the-box hot-deployment support for both Spring and Blueprint to make it easy to deploy your own Camel routes, as well as optionally installable features for all the available Camel components.
만약 당신이 먼저 컨테이너를 시작하기를 원하면 Apache Camel은 기본으로 설치되어 있다. 우리는 또한 Spring과 Blueprint가 당신의 Camel 라우터를 배포하기 쉽게 만들어 주기 위해 뿐만 아니라 부가적으로 모든 Camel 컴포넌트를 위한 설치 가능한 기능을 지원하는 핫 디플플로이 외부 박스를 가지고 있다

Goal of this guide(이 가이드의 목적)

The goal of this guide is to look into the details for using Camel inside ServiceMix:
이 가이드의 목적은 ServiceMix안에 Camel을 사용하기 위한 상세를 찾기 위한 것이다.

  • deployment options

  • installing additional components

Examples(예제)

The Apache ServiceMix distributions also contain a set of Camel examples. You can find these examples in theexamples/camel directory.
Apache ServiceMix 배포판은 Camel 예제 세트를 또한 포함한다. 당신은 examples/camel 디렉토리에서 그런 예제를 찾을 수 있다.

More information about Camel(Camel에 대한 이상의 정보)

More information about Camel itself, can be found on http://camel.apache.org.
Camel 그 자체에 대한 더 많은 정보는 http://camel.apache.org에 찾을 수 있다.

There's also a great book available about Camel
또한 Camel에 대한 가능한 책이다.

  • Ibsen, Claus, and Anstey, Jonathan. (December 2010). Camel in Action. Greenwich, CT: Manning. ISBN: 9781935182368.


[원본 출처] http://servicemix.apache.org/docs/5.0.x/activemq/activemq-camel-example.html


Using ActiveMQ with Camel (Camel을 가지고 ActiveMQ 사용하기)

Using Spring-DM (Spring-DM 사용하기)

It is often easy to define two application contexts for spring-dm, it helps you re-use configuration in Junit tests and cleanly separates OSGi from the normal spring application contexts.
그건은 종종 spring-dm을 위한 두개의 어플리케이션 컨텍스트를 정의하는 것이 쉽고 그것은 당신이 JUnit 테스트에서 환경구성을 재사용하고 보통의 Spring 어플리케이션 컨텍스트들로 부터 OSGi를 깨끗하게 분리하는 것을 돕는다.

You define these files in a bundle by adding them to the classpath under META-INF/spring
당신은 번들에서 META-INF/spring 폴더 아래 클래스패스에 그것들을 추가 함으로써 그 파일들을 정의하라

OSGi Application context (OSGi 어플리케이션 컨텍스트)

<?xml version="1.0" encoding="UTF-8"?>
<beans xmlns="http://www.springframework.org/schema/beans"
  xmlns:xsi="http://www.w3.org/2001/XMLSchema-instance"
  xmlns:tx="http://www.springframework.org/schema/tx"
  xmlns:ctx="http://www.springframework.org/schema/context"
  xmlns:osgi="http://www.springframework.org/schema/osgi"
  xmlns:osgix="http://www.springframework.org/schema/osgi-compendium"
  xsi:schemaLocation="
    http://www.springframework.org/schema/beans http://www.springframework.org/schema/beans/spring-beans.xsd
    http://www.springframework.org/schema/tx http://www.springframework.org/schema/tx/spring-tx.xsd
    http://www.springframework.org/schema/aop http://www.springframework.org/schema/aop/spring-aop.xsd
    http://www.springframework.org/schema/context http://www.springframework.org/schema/context/spring-context.xsd
    http://www.springframework.org/schema/osgi http://www.springframework.org/schema/osgi/spring-osgi.xsd
    http://www.springframework.org/schema/osgi-compendium http://www.springframework.org/schema/osgi-compendium/spring-osgi-compendium.xsd">

    <!-- Make sure we use the ServiceMix provided connection pool in our beans -->
    <osgi:reference id="jmsConnectionPool" interface="javax.jms.ConnectionFactory"/>

</beans>

Normal spring application context. (일반적인 Spring 어플리케이션 컨텍스트)

<?xml version="1.0" encoding="UTF-8"?>
<beans xmlns="http://www.springframework.org/schema/beans"
       xmlns:xsi="http://www.w3.org/2001/XMLSchema-instance"
       xmlns:camel="http://camel.apache.org/schema/spring"
       xsi:schemaLocation="
        http://www.springframework.org/schema/beans
        http://www.springframework.org/schema/beans/spring-beans-2.5.xsd
        http://camel.apache.org/schema/spring
        http://camel.apache.org/schema/spring/camel-spring-${camel-version}.xsd">

    <camelContext xmlns="http://camel.apache.org/schema/spring">
        <route>
            <from uri="jms:queue:start"/>
            <to uri="mock:result"/>
        </route>
    </camelContext>

    <!-- This bean will import use the OSGi service from the context above -->
    <bean id="jms" class="org.apache.camel.component.jms.JmsComponent">
        <property name="connectionFactory" ref="jmsConnectionPool" />
        <!-- If you have a transaction manager configured
        <property name="transacted" value="true" />
        <property name="transactionManager" ref="transactionManager" />
        -->
    </bean>

</beans>


번역자 주) 한번에 전체를 지정해주는 것이 아니라 jms Connection 의 경우 OSGi 에 구현해 두고 일반적인 어플리케이션에서는 그것을 ref로 참조한 Jms 컴포넌트를 사용하는 것을 말한다.


[원본 출처] http://servicemix.apache.org/docs/5.0.x/user/technology-selection.html


Technology selection guide(기술 선택 가이드)

ServiceMix 4 offers a set of different messaging and integration technologies:
ServiceMix 4 는 다른 메시징과 통합 기술 한 세트를 제공한다.

  • ActiveMQ

  • Camel

  • CXF

  • JBI

  • NMR

Depending on the solution you're building, you want to select one or more of these technologies. Below are some guidelines to help you pick the right mix for your problem.
만약 당신이 하나 또는 그 이상의 드 기술들을 선택하기를 원하면 당신이 만드는 솔루션에 종속되어 있다. 아래 당신의 문제를 올바르게 혼합하기 위해 선택하는 것을 도울 몇몇 가이드라인들이 있다.

When to use Camel? (언제 Camel을 사용하는가?)

For any integration scenario, we recommend to start as simple as possible. Camel allows you to build routes for integration scenario's quickly and efficiently. You can deploy these routes directly on ServiceMix by deploying the plain Spring XML route or by packaging the route in an OSGi bundle.
모든 연계 시나리오를 위해 우리는 가능한한 단순하게 시작 할 것을 추천한다. Camel 은 빠르고 충분히 통합의 시나리오를 위해 당신이 라우터를 빌드하는 것을 허용한다. 당신은 순수 Spring XML 라우터를 개발 함으로써 또는 OSGi 번들에 라우터를 패키징 함으로써 ServiceMix에 직접 그 라우터들을 배포할 수 있다. 

As you need more (advanced) features, start combining Camel with ActiveMQ, CXF and/or the NMR
좀 더 진보된 기능을 원하면 Camel을 ActiveMQ와 CXF와 그리고 NMR과 결합하는 것을 시작하라.

When to use ActiveMQ?(언제 ActiveMQ를 사용하는가?)

ActiveMQ is a JMS message broker, featuring support for clustering, pluggable persistence mechanism, master-slave configuration for failover, ...
ActiveMQ는 JMS 메시지 브로커이다. 클러스터링을 지원하고, 지속적인 메커니즘을 플러그 할수 있고, 장애조치(failover)를 위해 master-slave 환경구성을 하는 기능을 하고 있다.

ServiceMix 4 includes an instance of the ActiveMQ broker, which can be combined with Camel to provide easy-to-use message persistence and reliable messaging.
ServiceMix 4는 ActiveMQ 브로커의 인스턴스 하나를 포함한다. 그 인스턴스는 쉽게 사용할수 있는 메시지의 지속성과 신뢰할수 있는 메시지를  위해 Camel과 결합될 수 있다.

After setting up multiple instances of ActiveMQ (or ServiceMix 4) on the network, you can configure ActiveMQ clustering or master-slave mode to allow for a more reliable and scalable set-up.
네트워크 상에서 ActiveMQ ( 또는 ServiceMix 4)의 다수의 인스턴스를 설정한 뒤에 당신은 더 신뢰할수 있고 확장할수 있는 설정을 허용하기 위해 ActiveMQ 클러스터링 또는  master-slave 모드를 환경 구성할 수 있다.  

When to use CXF?(언제 CXF 를 사용하는가?)

CXF is an open-source services framework that you can use to suit your WS-* standards integration needs. It allows you to use common programming APIs like JAX-RS or JAX-WS for building your own services and to expose them to the outside world.

CXF 는 당신이 WS-* 표준 연계를 필요를 적합하게 하기 위해 사용할 수 있는 오픈소스 서비스 프레임워크이다.

You can use CXF from within your Camel routes with the Camel CXF component.
당신은 Camel CXF 컴포넌트를 사용하여 Camel 라우터들 안에서 CXF를 사용할 수 있다.

When to use NMR?(언제 NMR을 사용하는가?)

The NMR provides the basic ESB features for ServiceMix 4. You can use it to connect multiple camel routes in a lightweight way. It can also be used as a common transport on which you can add container-level auditing by registering your own ExchangeListener implementation.
NMR은 ServiceMix4를 위해 기본적인 ESB의 기능을 제공한다. 당신은 경량화된 방법에서 그것을 복수의 Camel 라우터들을 연결하기 위해 사용할 수 있다. 그것은 또한 당신이 당신 자신의 ExchangeListener 구현체를 등록함으로써 컨테이너 레벨의 심사하는 것을 추가 하기 위해서  보통의 운송으로 사용 될수 있다. 

When to use JBI?(언제 JBI를 사용하는가?)

We still support JBI 1.0 in ServiceMix 4 so you can leverage your previous investments and move your existing JBI artifacts from ServiceMix 3 to the new container with no/minimal changes before migrating them to use Camel and/or CXF directly. For new projects, you should consider JBI deprecated and always use Camel and/or CXF inside ServiceMix instead.
우리는 여전히 ServiceMix 4 에서 JBI 1.0을 지원한다. 그래서 당신은 Camel과 CXF를 직접 사용하기 위해 마이그래이션하기 전에 ServiceMix 3으로 부터 새 컨터에지로 없거나 최소의 변화로 당신의 이전 투자들의 이점을 가질수 있고 당신의 존재하고 있는 JBI 구조물들을 옮길수 있다.  새 프로젝트를 위해 당신은 사용되지 않는 JBI를 고려해야하고 대신에 ServiceMix 안쪽에 Camel 이나 또는 CXF를 항상 사용해야 한다. 


[원본 출처] http://servicemix.apache.org/docs/5.0.x/quickstart/features.html


Optional features (추가 기능)

Everything discussed in the quickstart guide so far is installed out-of-the-box in Apache ServiceMix, but we also have a lot of optional features that can be installed in the container when necessary.
지금까지 이 퀵스타트 가이드에서 논의된 모든 것이 Apache ServiceMix의 박스 안에 설치되어 있었다. 그러나 우리는 또한 필요할때  컨테이너 안에 설치 될수 있는 많은 추가 기능을 가지고 있다.

List of features

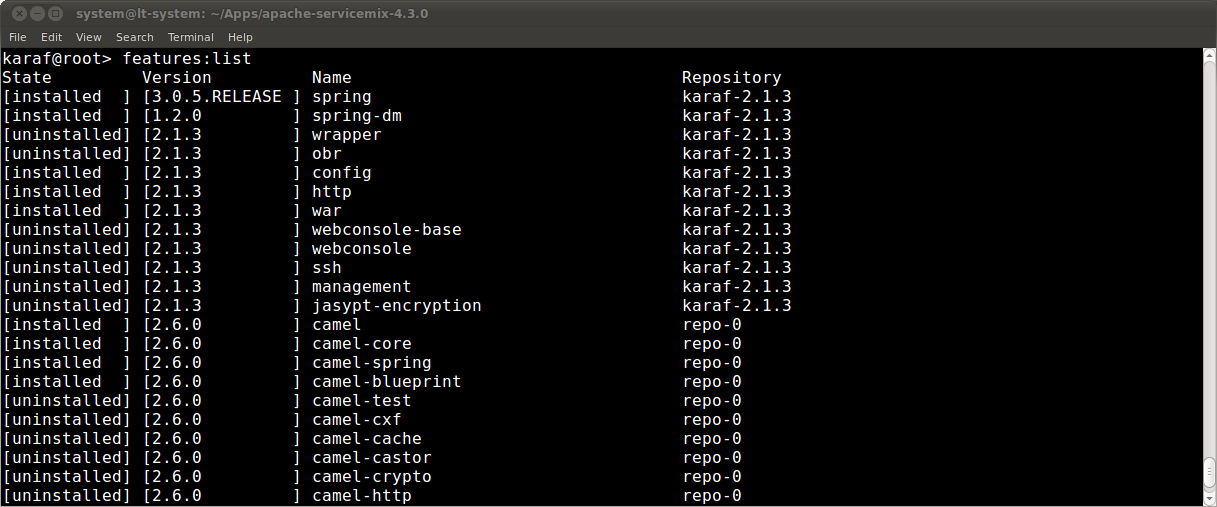
The list of features is available with the features:list command. The overview shows you whether or not the feature is currently installed, the version and the name of the feature.
이 기능 목록은 features:list 명령어를 통해서 가능하다. 이 개요는 현재 기능이 설치되어 있는지 아닌지를 보여준다 

The full list contains a lot of different features: optional Camel components, features for adding OBR or wrapper support to Serviceix, a web console, ... Again, you can use things like | and grep to find the things in the list that you're interested in.

전체 리스트는 많은 다른 기능을 포함한다. 추가 Camel 컴포넌트,  OBR 또는 ServiceMix를 지원하는 wrapper를 추가 하는 기능, 웹 콘솔, ... 또 당신은 그 리스트에서 당신이 흥미있는 그것들을 찾기 위해  "|" 와 grep 을 사용할 수 있다.

karaf@root> features:list | grep camel

Example: Web console(예제: 웹 콘솔)

To get the web console installed in ServiceMix, install the feature from your console
ServiceMix에 웹 콘솔을 설치 하기 위해 당신의 콘솔로 부터 기능을 설치하라

karaf@root> features:install webconsole

Afterwards, you can verify that the feature is marked installed in the overview. You'll notice that the webconsole-basefeature has also been installed as a requirement for the webconsole feature itself.
이후 이 개요에서 당신은 기능이 설치되었다는 표시될수 있는 것을 확인 할 수 있다. 당신은 표시될 것이다.  webconsole-base 기능이 또한 webconsole 기능 이 그 자체의 필요로 설치되었던 것을 보게 될 것이다.  

karaf@root> features:list | grep webconsole

You will now be able to point your browser to http://localhost:8181/system/console and login with user smx and passwordsmx to access the web console. From the webconsole, you can also start and stop bundles, install optional features again, ...
당신은 이제 당신의 브라우저에 http://localhost:8181/system/console을  출력하고 웹 콘솔에 접속하기 위해 사용자로 smx 비밀번호로 smx를 사용하여 로그인 할 수 있을 것이다. 웹콘솔로 부터 당신은 당신의 번들을 시작하고 멈출수 있고 다시 추가 기능을 설치 할수 있다.


[원본 출처] http://servicemix.apache.org/docs/5.0.x/quickstart/camel.html


Using Camel(Camel 사용하기)

Now that we know how to operate Apache ServiceMix through the shell console, it's time to start using it for what it is built for. Let's build our very first integration solution with a Camel route and deploy it on ServiceMix.
쉘 콘솔을 통하여 Apache ServiceMix를 어떻게 조작하는지 알게된 지금이 무엇을 빌드하기 위해 그것을 사용하는 것을 시작해야 하는 그때다. 우리의 첫번째 연계 솔루션을 Camel 라우터를 가지고 빌드 하고 그것을 ServiceMix에 배포해 보자

Our simple scenario(간단한 시나리오)

In this simple scenario, we're going to move files from an input directory calledcamel/input to an output directory called camel/output. To ensure we can keep track of which files get moved, we'll also write a message to the log file whenever we move a file.
이 단순 시나리오에서 우리는 calledcamel/input 이라는 input 디렉토리에서 camel/output 이라 불리는 output 디렉토리로 파일을 옮기게 될 것이다. 우리는 파일을 이동하는 것을 추적을 유지할 수 있도록 확인 하기 위해 우리는 또한 우리가 파일을 옮길때마다 로그 파일에 메시지를 기록 할 것이다. 

Creating the route(라우터 생성하기)

One of the most simple ways to deploy a new route on ServiceMix, is by defining the route in a Blueprint XML file.
ServiceMix에 새로운 라우터를 배포하기 위해 가장 단순한 방법중에 하나는 Blueprint  XML 파일에 라우터를 정의 하는 것에 의한 것이다.

<?xml version="1.0" encoding="UTF-8"?>
<blueprint
    xmlns="http://www.osgi.org/xmlns/blueprint/v1.0.0"
    xmlns:xsi="http://www.w3.org/2001/XMLSchema-instance"
    xsi:schemaLocation="
      http://www.osgi.org/xmlns/blueprint/v1.0.0
      http://www.osgi.org/xmlns/blueprint/v1.0.0/blueprint.xsd">

    <camelContext xmlns="http://camel.apache.org/schema/blueprint">
      <route>
        <from uri="file:camel/input"/>
        <log message="Moving ${file:name} to the output directory"/>
        <to uri="file:camel/output"/>
      </route>
    </camelContext>

</blueprint>

Deploying the route(라우터 배포하기)

In order to deploy and start the route, just copy the XML file you created into ServiceMix' deploy directory. The file will get picked up and deployed by ServiceMix. You will see a camel/input folder appear in your ServiceMix installation directory and any files you copy into that directory will get moved into the camel/output directory.
라우터를 배포하고 시작할 목적으로 단지 ServiceMix의 deploy 디렉토리에 당신이 만든 XML 파일을 복사하라. 그 파일은 ServiceMix에 의해 올려지고 배포 될 것이다. 당신은 SericeMix 설치 디렉토리에 camel/input 폴더가 나타나는 것을 보게 될 것이고 어떤 파일을 당신이 그 디렉토리에 복사 하게 되면 camel/output 디렉토리로 옮겨 지게 될 것이다.

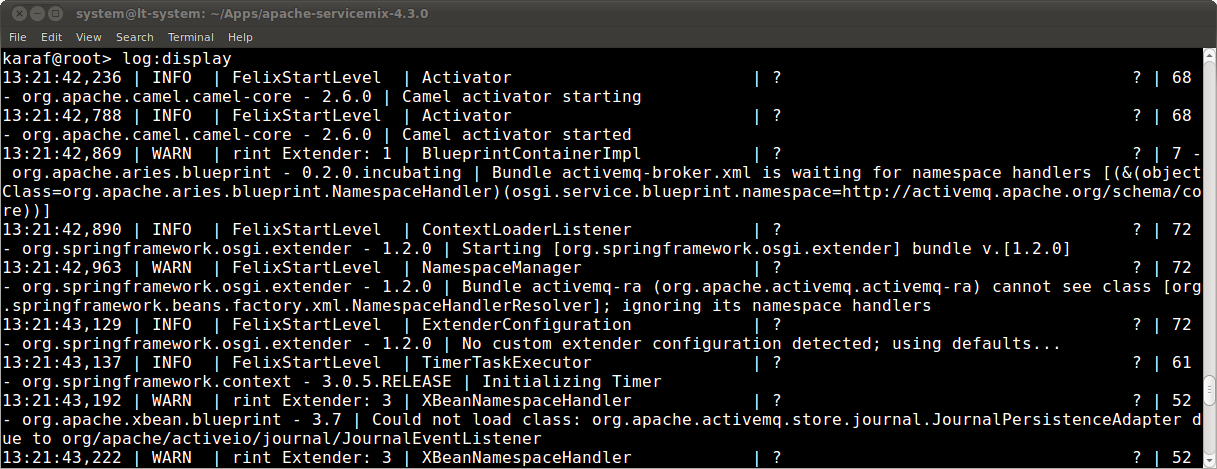
If you do a log:display in the shell, you will also see the log output for every file that's been moved.
만약 당신이 쉘에서 log:display 라고 치면 당신은 또한 옮겨졌었던 모든 파일들을 위한 log 결과를 보게 될 것이다. 

Using the shell to manage the route(라우터를 관리하기 위해 쉘 사용하기)

Using osgi:list, you'll notice that your XML file has been transformed into a bundle and that the Blueprint container has been created to start your Camel route.
osgi:list 를 사용하면 당신은 당신의 XML 파일이 번들속으로 전송되었었고 Blueprint 컨테이너에 당신의 Camel 라우터가 시작하기 위해 생성되었었다는 것을 알게 될 것이다. 


From this output, you also learn that the bundle id for your XML file is 200. This allow you to start and stop the route whenever necessary. Let's give this a go now...
이번 Output으로 부터 우리는 또한 당신의 XML 파일을 위한 번들 ID가 200이라는 것을 배우게 된다. 그것은 당신이 필요할때 언제나 라우터를 시작하고 정지하는 것을 허락한다. 다음과 같이 해보자. 

First, stop the route with
먼저 다음으로 라우터를 멈추보자

karaf@root> osgi:stop 200

The route is no longer active, so any files you copy into the orders/input folder will remain there for now. As soon as you restart the route, the pending files will get moving again.
라우터는 더이상 살아있지 않다. 그래서 orders/input 폴더에 복사했던 어떤 파일들도 지금 거기에 남게 될 것이다. 당신이 라우터를 재시작하자마자 보류된 파일들이 다시 옮겨지게 될 것이다.

karaf@root> osgi:start 200


'Apache ServiceMix' 카테고리의 다른 글

ServiceMix Quickstart 추가 기능  (0) 2014.08.11
ServiceMix Quickstart ActiveMQ 추가하기  (0) 2014.07.30
ServiceMix Quickstart 콘솔  (0) 2014.07.29
ServiceMix Quickstart 설치  (0) 2014.07.29
ServiceMix Quickstart 소개  (0) 2014.07.29

[원본 출처] http://servicemix.apache.org/docs/5.0.x/quickstart/console.html


Apache ServiceMix console(Apache ServiceMix 콘솔)

Now that we successfully installed and started Apache ServiceMix, we'll take a closer look at the console. This is where you manage your ServiceMix instance, add and remove bundles, install optional features, ...
우리가 성공적으로Apache ServiceMix를 설치를 했고 시작한 지금, 우리는 콘솔로 눈이 가게 될 것이다. 당신이 당신의 ServiceMix를 어디서 관리하고 번들을 추가하고 삭제하는지 이다. 그러려면 옵션 기능을 설치하라

Working with bundles(번들 작동시키기)

When ServiceMix is first started, a whole set of bundles providing the core features for the product are being installed. Let's use the command console to find out more about them...
SerivceMix를 먼저 시작할때 프로젝트를 위한 코어기능을 제공하기 위한 번들의 전체 세트를 설치하게 될 것이다. 자 그것들에 대해 좀더 많이 알아내기 위해서는 커멘트 콘솔을 사용해보자.

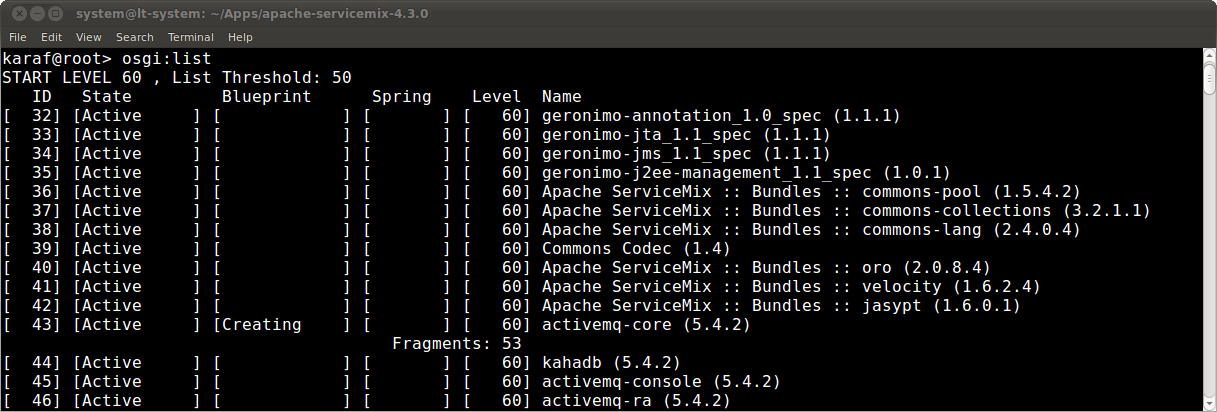
The osgi:list command can be used to get a list of all bundles currently installed. Enter this
osgi:list 명령어는 현재 설치된 모든 번들의 리스트를 얻기 위해 사용할 수 있다. 이렇게 입력하라.

karaf@root> osgi:list

This is what the output looks like if you run this on your ServiceMix instance.
만약 당신이 ServiceMix 인스턴스를 실행시켰다면 아래 같은 보이는 결과를 보게 될 것이다. 

For every bundle, you see:
모든 번들에서 당신은 본다.

  • the bundle id (번들 ID)

  • the bundle state (번들 상태)

  • if the bundle contains a Blueprint or Spring XML file, the next 2 columns will show you if the beans defined there were created successfully
    만약 번들이 블루프린트나  Spring XML 파일을 포함하고 있다면 다음 2 컬럼들이 Bean들이 성공적으로 생성되었는지 정의 된 것을 보여 주게 될것이다.

  • the bundle start level (번들의 실행 수준)

  • the bundle name and version (번들의 이름과 버전)

If you're looking for something specific in the list, you can use unix-like pipes and utilities to help you. An example: to look for all Camel related bundles...
만약 당신이 이 리스트에서 무언거 특별한 것을 찾는다면 당신은 unix 처럼 pipe들과 유틸리티를 사용하여 당신을 도울 수 있을 것이다.

karaf@root> osgi:list | grep camel

Working with logging(로그 동작시키기)

Many of the applications you write will have some form of log output. To look at the message in the log file, you can us the log:diplay command.
당신이 썼던 어플리케이선의 대부분은 로그 결과물의 몇몇 형태를 가지게 될 것이다. log 파일에서 메시지를 찾기 위해 당신은 우리의 log:diplay 커멘더를 이용 할 수 있다.

karaf@root> log:display

If you're only interested in the latest exception in the log file, you can uselog:display-exception instead.
만약 당신이 단지 log 파일에서 최근 Exception 에 관심이 있다면 당신은 대신에 log:display-exception 를 사용 할 수 있다. 

karaf@root> log:display-exception

You can also change the log level at runtime by using the log:set command. You can try these commands on your instance now by first setting the log level to DEBUG and then using grep to make sure that you can actually see the extra logging.
당신은 또한 log:set 커멘더를 사용함으로써 런타임환경에서 로그 레벨을 변경 할 수 있다. 당신은 먼저 DEBUG 레벨을 설정하고 그리고 당신이 실제 추가 로깅을 볼때 확인하기 위해 grep 을 사용함으로써 현재 당신의 인스턴스에 그 커멘트들을 사용할 수 있다.

karaf@root> log:set DEBUG
karaf@root> log:display | grep DEBUG

Afterwards, revert the log level to its original INFO value again with log:set.
나중에 log:set 을 사용하여 다시 원래의 INFO 값으로 로그 레벨을 되돌린다.

karaf@root> log:set INFO

...and there's a lot more (그리고 더 많은 것들이 있다)

These are obviously just a few examples of what the command shell is all about. There are a lot more commands in the shell to help you deploy, monitor, manage and troubleshoot the applications you're building with ServiceMix.
분명히 커멘트 쉘의 모든 것에 대해 단지 몇몇 예제만 있다. 당신이 ServiceMix에 빌드된 어플리케이션을 배포, 모니터링, 관리, 문제 해결하는 것을 됩기 위한 쉘에서의 커멘더 들이 더 많이 있다. 


'Apache ServiceMix' 카테고리의 다른 글

ServiceMix Quickstart ActiveMQ 추가하기  (0) 2014.07.30
ServiceMix Quickstart Camel 라우팅  (0) 2014.07.29
ServiceMix Quickstart 설치  (0) 2014.07.29
ServiceMix Quickstart 소개  (0) 2014.07.29
ServiceMix 문서  (0) 2014.07.28

[원본 출처] http://servicemix.apache.org/docs/5.0.x/quickstart/installation.html


Installation(설치)

Before we can start working with Apache ServiceMix, we have to get it installed and running on our local machine first.
우리가 Apache ServiceMix를 가지고 작업하는 것을 시작하기 전에 우리는 먼저 우리의 로컬머신에 설치하고 실행하는 것을 가지고 있다.

System requirements(시스템 요구사항)

For running Apache ServiceMix itself, you'll need
Apache ServiceMix 자체를 실행하기 위해서는 우리는 필요로 하게 된다.

  • Java Runtime Environment (JRE) 1.6.x (Java 6) or
    Java Runtime Environment (JRE) 1.7.x (Java 7)
    JRE 1.6.X나 1.7.X 

  • About 100 MB of free disk space for the default assembly
    디폴트 어셈블리를 위한 약 100MB 이상의 여유 디스크 공간

If you're developing your own integration applications and OSGi bundles, you'll also need
만약 우리가 연계 어플리케이션과 OSGi 번들을 개발 하고 있다면 우리는 또한 필요로 하게 된다. 

  • Java Developer Kit (JDK) 1.6.x (Java 6) or
    Java Developer Kit (JDK) 1.7.x (Java 7)
    JDK 1.6.X 나 1.7.X 

  • Apache Maven 3.0.4 or higher
    Apache Maven 3.0.4 또는 그 이상

Downloading Apache ServiceMix(Apache ServiceMix 다운로드 받기)

Apache ServiceMix 5.0.0-SNAPSHOT is available under the Apache License v2 and can be downloaded from http://servicemix.apache.org/downloads.html.
Apache ServiceMix 5.0.0-SNAPSHOT 이 Apache License v2 로 가능하며 http://servicemix.apache.org/downloads.html 에서 다운로드 받을 수 있다.

Depending on your operation system, you should download either the tar.gz or the zip file:
당신의 OS에 영향을 받으며 당신은 tar.gz 나 zip 파일을 다운로드 할 수 있다.

  • tar.gz for Linux/Unix/MacOS X
    Linux/Unix/MacOS X 를 위해서는 tar.gz

  • zip for Windows
    Windows를 위해서는 zip 

Installing Apache ServiceMix(Apache ServiceMix 설치하기)

Installing Apache ServiceMix is as simple as uncompressing the downloaded archive on your hard disk. For the rest of this guide, we'll refer to the this location as<SERVICEMIX_HOME>.
Apache ServiceMix를 설치하기는 당신의 하드디스크에 다운로드된 아카이브를 압축을 푸는 것 같이 간단하다. 이 가이드의 나머지 부분은 우리가 <SERVICEMIX_HOME> 라는 위치를 참조하게 될 것이다.

Starting Apache ServiceMix(Apache ServiceMix 시작하기)

Depending on your platform, start Apache ServiceMix by following the instructions below. After starting the container, you will have access to the console from which you can manage the container.
당신에 플랫폼에 따라 아래 따라 나오는 지침에 의해 Apache ServiceMix를 시작한다. 당신이 컨테이너를 시작한 후에 당신은 컨테이너를 관리 할수 있는 콘솔에 접속할 수 있을 것이다. 

On Windows(윈도우에서)

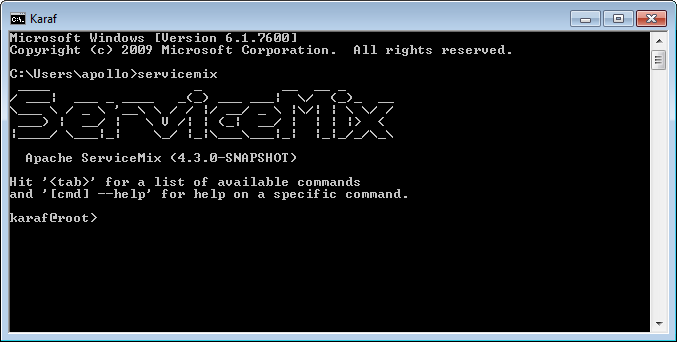
In a command prompt window, navigate to the directory where you extracted ServiceMix and run the bin\servicemix.bat file.
윈도우 커멘트 프롬프트에서 당신이 ServiceMix를 압축을 풀었던 디렉토리로 이동하고 bin\servicemix.bat 파일을 실행하라

Example: if ServiceMix in installed in the c:\tools\apache-servicemix-5.0.0-SNAPSHOT directory
예제 : 만약 ServiceMix가 c:\tools\apache-servicemix-5.0.0-SNAPSHOT 디렉토리에 설치 되어 있다면 

> cd c:\tools\apache-servicemix-5.0.0-SNAPSHOT
> .\bin\servicemix

On Linux/Unix/MacOS X (Linux/Unix/MacOS X 에서)

On a command shell, navigate to the directory where you extracted ServiceMix and the bin/servicemix shell script
커멘드 쉘에서 당신이 ServiceMix 를 압축 풀었던 디렉토리로 이동하고 그리고 bin/servicemix 쉘 스크립트를 실행하라.

Example: if ServiceMix is installed in the ~/Applications/apache-servicemix-5.0.0-SNAPSHOT directory.
예제: 만약 ServiceMix를 ~/Applications/apache-servicemix-5.0.0-SNAPSHOT 디렉토리에 설치 하였다면  

$ cd ~/Applications/apache-servicemix-5.0.0-SNAPSHOT
$ ./bin/servicemix


'Apache ServiceMix' 카테고리의 다른 글

ServiceMix Quickstart Camel 라우팅  (0) 2014.07.29
ServiceMix Quickstart 콘솔  (0) 2014.07.29
ServiceMix Quickstart 소개  (0) 2014.07.29
ServiceMix 문서  (0) 2014.07.28
ServiceMix 다운로드  (0) 2014.07.28

[원본 출처] http://servicemix.apache.org/docs/5.0.x/quickstart/index.html


Introduction(소개)

First of all, welcome to the Apache ServiceMix project!
먼저, Apache ServiceMix 프로젝트에 온 것을 환영한다.

The goal of this Quickstart guide is to give you a 20-minute overview of what ServiceMix is and what you can do with it. In that time, we'll install ServiceMix on your machine, deploy some basic integration routes and extend the container with an additional feature.
퀵스타트 가이드의 목적은 ServiceMix 가 무엇인지 우리가 그것을 가지고 무엇을 할 수 있는지의 20분 개념을 주는 것이다. 우리는 당신의 머신에 ServiceMix를 설치하고 몇가지 기본 연계 라우트와 추가 기능을 하지고 컨테이너를 확장 하게 될 것이다. 


'Apache ServiceMix' 카테고리의 다른 글

ServiceMix Quickstart 콘솔  (0) 2014.07.29
ServiceMix Quickstart 설치  (0) 2014.07.29
ServiceMix 문서  (0) 2014.07.28
ServiceMix 다운로드  (0) 2014.07.28
ServiceMix Overview (개요)  (0) 2014.07.25

[원본 출처] http://servicemix.apache.org/documentation.html


Documentation(문서)

Latest version (4.4.x) (마지막버전 4.4.x)

Quickly navigate to one of the guides below...
아래 가이드 중에 하나로 빠르게 길안내한다.

... or browse the 4.4.x documentation site
또는 4.4.x documentation site 찾는다.

Other versions (다른 버전들)

Nothing here yet - let's get the latest version documented first ;-)
여전히 여기에 있지 않다. 먼저 최근 버전 문서를 얻어보자 
We might want to include a link to the original wiki exported pages though
우리는 원본 위키에 익스포트된 페이지를 통해서 링크가 포함 되기를 원한다.


'Apache ServiceMix' 카테고리의 다른 글

ServiceMix Quickstart 콘솔  (0) 2014.07.29
ServiceMix Quickstart 설치  (0) 2014.07.29
ServiceMix Quickstart 소개  (0) 2014.07.29
ServiceMix 다운로드  (0) 2014.07.28
ServiceMix Overview (개요)  (0) 2014.07.25

[원본 출처] http://servicemix.apache.org/downloads.html


Download(다운로드)

The latest release is the ServiceMix 5.1.0 Release. We strongly encourage all users to use this release.
최근 릴리즈는 ServiceMix 5.1.0 Release 이다 우리는 모든 사용자들이 이번 릴리즈를 사용할 것을 강하게 권장한다 

Default assembly

Our default assembly is the best way to get started with Apache ServiceMix.
우리 디폴트 어셈블리는 Apache ServiceMix를 시작하기 위한 가장 좋은 방법이다.

Source assembly

Use this if you want to build Apache ServiceMix from source yourself
만약 당신이 Apache ServiceMix를 스스로 소스부터 빌드 하기를 원하면 사용하라

Documentation

Links to the documentation pages for this version
이 버전의 문서 페이지를 링크한다.

The above URLs use redirection
위 URL들을 리다이렉션 사용

The above URLs use the Apache Mirror system to redirect you to a suitable downloads for your download. Some users have experienced issues with some versions of browsers (e.g. some Safari browsers). If the download doesn't seem to work for you from the above URL then try using FireFox
위 URL들을 당신의 다운로드의 적합한 다운로드를 위해서 Apache Mirror 시스템을 리다이렉션 하여 사용한다. 어떤 사용자들은 브라우져의 몇몇 버전의 이슈를 경험했었다. (예를 들면 몇몇 사파리 브라우저들). 만약 다운로드가 위 URL로부터 작동하지 않으면 FireFox를 사용하여 시도하라

Development snapshots(개발 스냅샷)

We have development snapshots available for
우리는 이용가능한 개발 스냅샷을 가지고 있다.

Previous Releases(이전 릴리즈)

An archive of previous releases can be found here.
이전 릴리드 아카이브는 여기에서 찾을수 있다.


'Apache ServiceMix' 카테고리의 다른 글

ServiceMix Quickstart 콘솔  (0) 2014.07.29
ServiceMix Quickstart 설치  (0) 2014.07.29
ServiceMix Quickstart 소개  (0) 2014.07.29
ServiceMix 문서  (0) 2014.07.28
ServiceMix Overview (개요)  (0) 2014.07.25

+ Recent posts