[원본 출처] http://servicemix.apache.org/docs/5.0.x/quickstart/activemq.html


Adding ActiveMQ to the 'Mix(ServiceMix에 ActveMQ 추가 하기)

Out-of-the-box, every Apache ServiceMix instance comes with an embedded ActiveMQ JMS broker. This makes it easy to communicate between Camel routes using persistent messages on the same machine, but it will also enable you to distribute your routes over multiple instances afterwards for clustering or load-balancing. 
박스의 안에서, 모든 Apache ServiceMix 인스턴스는 내장된 ActiveMQ JMX 브로커를 함께 제공된다. 이는 그것을 같은 기기에서 지속성있는 메시지를 사용하여 Camel 라우터들 사이를 통신하기 쉽게 만든다. 그러나 그것은 또한 당신을 클러스터링 또는 로드밸런싱 이후에 다수의 인스턴스들 위로 당신의 라우터들이 분배하도록 가능하게 할 것이다.

Our scenario(우리 시나리오:이번 예제)

In this scenario, we also want to move files between directories. Instead of logging the move directly, we are going to send an event JMS message onto a queue. Afterwards, we will create a second Camel route to receive the events and log them.
이 시나리오에서, 우리는 또한 이렉토리들 사이에서 파일이 옮겨지는 것을 원한다. 직접적으로 이동 로그기록 대신에 우리는 queue안에 이벤트 JMS 메시지를 보내내게 될 것이다.

Moving files and sending event messages(파일을 이동하고 이벤트 메시지 전송하기)

The first Blueprint XML file we'll create contains a Camel route that moves the files fromactivemq/input to the activemq/output directory. Afterwards, it will generate an event message and send that to an ActiveMQ queue called events.
우리가 만들게 될 첫번째 Blueprint  XML 파일은 activemq/input 에서 activemq/outpu 디렉토리로 파일을 옮기는 Camel 라우터를 포함한다. 이후 그것은 이벤트 메시지를 생성하고 ActiveMQ queue에 이벤트를 콜하기 위해 그것을 보낼 것이다. 

<?xml version="1.0" encoding="UTF-8"?>
<blueprint
    xmlns="http://www.osgi.org/xmlns/blueprint/v1.0.0"
    xmlns:xsi="http://www.w3.org/2001/XMLSchema-instance"
    xsi:schemaLocation="
      http://www.osgi.org/xmlns/blueprint/v1.0.0
      http://www.osgi.org/xmlns/blueprint/v1.0.0/blueprint.xsd">

    <camelContext xmlns="http://camel.apache.org/schema/blueprint">
      <route>
        <from uri="file:activemq/input"/>
        <to uri="file:activemq/output"/>

        <setBody>
          <simple>
            FileMovedEvent(file: ${file:name}, timestamp: ${date:now:hh:MM:ss.SSS})
          </simple>
        </setBody>
        <to uri="activemq://events" />
      </route>
    </camelContext>
</blueprint>

Save this file in ServiceMix' deploy folder and use osgi:list to check on the bundle status as you did with the simple Camel example. You should now be able to put files in the activemq/input directory and see them being moved to activemq/output.
ServiceMix의 deploy폴더에 이 파일을 저장하라 그리고 당신이 했던 단순 Camel 예제의 번들 상태를 체크 하기 위해 osgi:list를 이용하라. 당신은 지금 activemq/input 디렉토리에 파일을 올리는 것을 할수 있게 될 것이고 그것들이 activemq/output로 이동 되는 것을 보게 될 것이다.      

Receiving the event messages(이벤트 메시지 받기)

After deploying the first XML file, you're obviously not seeing any events being logged yet. The event messages are sent to an ActiveMQ queue, but there's nobody to receive the events yet. Let's change that now by creating a second Blueprint XML file.
첫번재 XML 파일이 배포되고난 이후에 당신은 분명히 아직 어떤 이벤트가 로깅되는 것을 볼수 없을 것이다. 이 이벤트 메시지는 ActiveMQ queue에 보내진다 그러나 아직 그 이벤트를 받은 누구도 없다. 이제 두번째 Blueprint  XML 파일을 생성함으로써 지금 변경해보자 


<?xml version="1.0" encoding="UTF-8"?>
<blueprint
    xmlns="http://www.osgi.org/xmlns/blueprint/v1.0.0"
    xmlns:xsi="http://www.w3.org/2001/XMLSchema-instance"
    xsi:schemaLocation="
      http://www.osgi.org/xmlns/blueprint/v1.0.0
      http://www.osgi.org/xmlns/blueprint/v1.0.0/blueprint.xsd">

    <camelContext xmlns="http://camel.apache.org/schema/blueprint">
      <route>
        <from uri="activemq://events"/>
        <to uri="log:events"/>
      </route>
    </camelContext>
</blueprint>

As soon as this second file has been deployed, you'll start seeing the event messages in your log:display output.
두번째 파일이 배포되자 마자 당신은 당신의 log:display 출력에 이벤트 메시지를 보는 것을 시작하게 될 것이다.

Using the shell to manage the routes(라우터들 관를 위한 쉘 사용하기)

You can now start and stop both routes from the command shell. The important thing to note here is that you can stop the event handler route while files are being processed. As soon as you restart that bundle afterwards, you'll receive the events from all files that have been moved while the route was not running.
당신은 이제 커멘드 쉘을 통해서 라우터를 시작하고 멈출수 있다. 여기 기록하는 것이 중요한 것은 파일이 전송되는 동안 당신은 이벤트 핸들러 라우터를 멈출 수 있다. 당신이 이후 그 번들을 재시작 하자 마자 당신은 라두터가 동작하지 않는 동안 옮겨졌던 모든 파일들로 부터 이벤트를 받게 될 것이다.   


'Apache ServiceMix' 카테고리의 다른 글

ServiceMix User Guide - 소개  (0) 2014.08.11
ServiceMix Quickstart 추가 기능  (0) 2014.08.11
ServiceMix Quickstart Camel 라우팅  (0) 2014.07.29
ServiceMix Quickstart 콘솔  (0) 2014.07.29
ServiceMix Quickstart 설치  (0) 2014.07.29

[원본 출처] http://servicemix.apache.org/docs/5.0.x/quickstart/camel.html


Using Camel(Camel 사용하기)

Now that we know how to operate Apache ServiceMix through the shell console, it's time to start using it for what it is built for. Let's build our very first integration solution with a Camel route and deploy it on ServiceMix.
쉘 콘솔을 통하여 Apache ServiceMix를 어떻게 조작하는지 알게된 지금이 무엇을 빌드하기 위해 그것을 사용하는 것을 시작해야 하는 그때다. 우리의 첫번째 연계 솔루션을 Camel 라우터를 가지고 빌드 하고 그것을 ServiceMix에 배포해 보자

Our simple scenario(간단한 시나리오)

In this simple scenario, we're going to move files from an input directory calledcamel/input to an output directory called camel/output. To ensure we can keep track of which files get moved, we'll also write a message to the log file whenever we move a file.
이 단순 시나리오에서 우리는 calledcamel/input 이라는 input 디렉토리에서 camel/output 이라 불리는 output 디렉토리로 파일을 옮기게 될 것이다. 우리는 파일을 이동하는 것을 추적을 유지할 수 있도록 확인 하기 위해 우리는 또한 우리가 파일을 옮길때마다 로그 파일에 메시지를 기록 할 것이다. 

Creating the route(라우터 생성하기)

One of the most simple ways to deploy a new route on ServiceMix, is by defining the route in a Blueprint XML file.
ServiceMix에 새로운 라우터를 배포하기 위해 가장 단순한 방법중에 하나는 Blueprint  XML 파일에 라우터를 정의 하는 것에 의한 것이다.

<?xml version="1.0" encoding="UTF-8"?>
<blueprint
    xmlns="http://www.osgi.org/xmlns/blueprint/v1.0.0"
    xmlns:xsi="http://www.w3.org/2001/XMLSchema-instance"
    xsi:schemaLocation="
      http://www.osgi.org/xmlns/blueprint/v1.0.0
      http://www.osgi.org/xmlns/blueprint/v1.0.0/blueprint.xsd">

    <camelContext xmlns="http://camel.apache.org/schema/blueprint">
      <route>
        <from uri="file:camel/input"/>
        <log message="Moving ${file:name} to the output directory"/>
        <to uri="file:camel/output"/>
      </route>
    </camelContext>

</blueprint>

Deploying the route(라우터 배포하기)

In order to deploy and start the route, just copy the XML file you created into ServiceMix' deploy directory. The file will get picked up and deployed by ServiceMix. You will see a camel/input folder appear in your ServiceMix installation directory and any files you copy into that directory will get moved into the camel/output directory.
라우터를 배포하고 시작할 목적으로 단지 ServiceMix의 deploy 디렉토리에 당신이 만든 XML 파일을 복사하라. 그 파일은 ServiceMix에 의해 올려지고 배포 될 것이다. 당신은 SericeMix 설치 디렉토리에 camel/input 폴더가 나타나는 것을 보게 될 것이고 어떤 파일을 당신이 그 디렉토리에 복사 하게 되면 camel/output 디렉토리로 옮겨 지게 될 것이다.

If you do a log:display in the shell, you will also see the log output for every file that's been moved.
만약 당신이 쉘에서 log:display 라고 치면 당신은 또한 옮겨졌었던 모든 파일들을 위한 log 결과를 보게 될 것이다. 

Using the shell to manage the route(라우터를 관리하기 위해 쉘 사용하기)

Using osgi:list, you'll notice that your XML file has been transformed into a bundle and that the Blueprint container has been created to start your Camel route.
osgi:list 를 사용하면 당신은 당신의 XML 파일이 번들속으로 전송되었었고 Blueprint 컨테이너에 당신의 Camel 라우터가 시작하기 위해 생성되었었다는 것을 알게 될 것이다. 


From this output, you also learn that the bundle id for your XML file is 200. This allow you to start and stop the route whenever necessary. Let's give this a go now...
이번 Output으로 부터 우리는 또한 당신의 XML 파일을 위한 번들 ID가 200이라는 것을 배우게 된다. 그것은 당신이 필요할때 언제나 라우터를 시작하고 정지하는 것을 허락한다. 다음과 같이 해보자. 

First, stop the route with
먼저 다음으로 라우터를 멈추보자

karaf@root> osgi:stop 200

The route is no longer active, so any files you copy into the orders/input folder will remain there for now. As soon as you restart the route, the pending files will get moving again.
라우터는 더이상 살아있지 않다. 그래서 orders/input 폴더에 복사했던 어떤 파일들도 지금 거기에 남게 될 것이다. 당신이 라우터를 재시작하자마자 보류된 파일들이 다시 옮겨지게 될 것이다.

karaf@root> osgi:start 200


'Apache ServiceMix' 카테고리의 다른 글

ServiceMix Quickstart 추가 기능  (0) 2014.08.11
ServiceMix Quickstart ActiveMQ 추가하기  (0) 2014.07.30
ServiceMix Quickstart 콘솔  (0) 2014.07.29
ServiceMix Quickstart 설치  (0) 2014.07.29
ServiceMix Quickstart 소개  (0) 2014.07.29

[원본 출처] http://servicemix.apache.org/docs/5.0.x/quickstart/console.html


Apache ServiceMix console(Apache ServiceMix 콘솔)

Now that we successfully installed and started Apache ServiceMix, we'll take a closer look at the console. This is where you manage your ServiceMix instance, add and remove bundles, install optional features, ...
우리가 성공적으로Apache ServiceMix를 설치를 했고 시작한 지금, 우리는 콘솔로 눈이 가게 될 것이다. 당신이 당신의 ServiceMix를 어디서 관리하고 번들을 추가하고 삭제하는지 이다. 그러려면 옵션 기능을 설치하라

Working with bundles(번들 작동시키기)

When ServiceMix is first started, a whole set of bundles providing the core features for the product are being installed. Let's use the command console to find out more about them...
SerivceMix를 먼저 시작할때 프로젝트를 위한 코어기능을 제공하기 위한 번들의 전체 세트를 설치하게 될 것이다. 자 그것들에 대해 좀더 많이 알아내기 위해서는 커멘트 콘솔을 사용해보자.

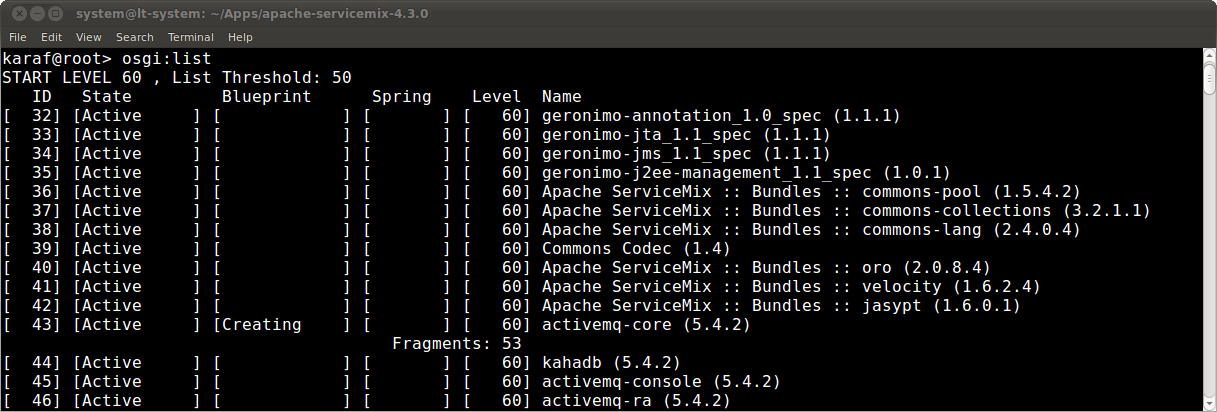
The osgi:list command can be used to get a list of all bundles currently installed. Enter this
osgi:list 명령어는 현재 설치된 모든 번들의 리스트를 얻기 위해 사용할 수 있다. 이렇게 입력하라.

karaf@root> osgi:list

This is what the output looks like if you run this on your ServiceMix instance.
만약 당신이 ServiceMix 인스턴스를 실행시켰다면 아래 같은 보이는 결과를 보게 될 것이다. 

For every bundle, you see:
모든 번들에서 당신은 본다.

  • the bundle id (번들 ID)

  • the bundle state (번들 상태)

  • if the bundle contains a Blueprint or Spring XML file, the next 2 columns will show you if the beans defined there were created successfully
    만약 번들이 블루프린트나  Spring XML 파일을 포함하고 있다면 다음 2 컬럼들이 Bean들이 성공적으로 생성되었는지 정의 된 것을 보여 주게 될것이다.

  • the bundle start level (번들의 실행 수준)

  • the bundle name and version (번들의 이름과 버전)

If you're looking for something specific in the list, you can use unix-like pipes and utilities to help you. An example: to look for all Camel related bundles...
만약 당신이 이 리스트에서 무언거 특별한 것을 찾는다면 당신은 unix 처럼 pipe들과 유틸리티를 사용하여 당신을 도울 수 있을 것이다.

karaf@root> osgi:list | grep camel

Working with logging(로그 동작시키기)

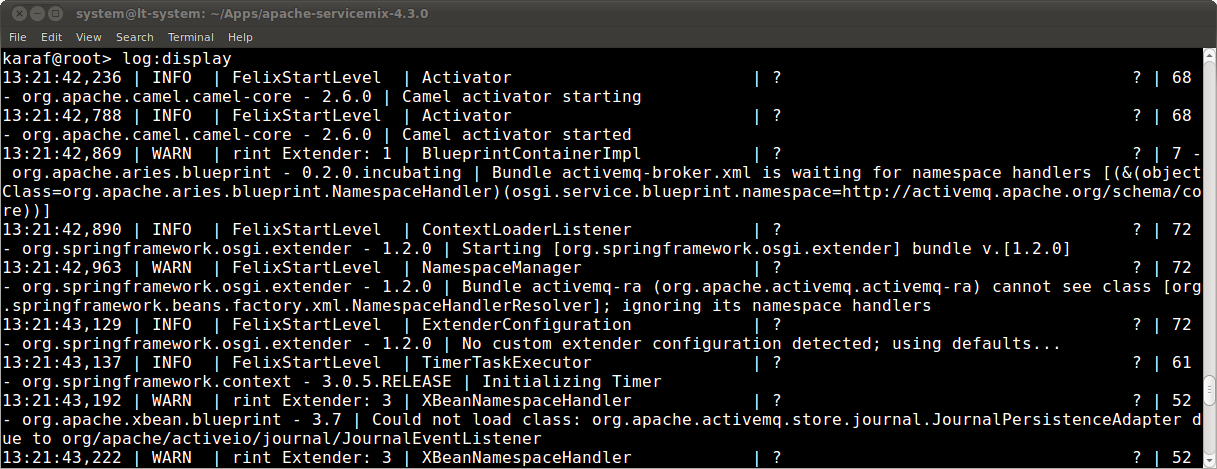
Many of the applications you write will have some form of log output. To look at the message in the log file, you can us the log:diplay command.
당신이 썼던 어플리케이선의 대부분은 로그 결과물의 몇몇 형태를 가지게 될 것이다. log 파일에서 메시지를 찾기 위해 당신은 우리의 log:diplay 커멘더를 이용 할 수 있다.

karaf@root> log:display

If you're only interested in the latest exception in the log file, you can uselog:display-exception instead.
만약 당신이 단지 log 파일에서 최근 Exception 에 관심이 있다면 당신은 대신에 log:display-exception 를 사용 할 수 있다. 

karaf@root> log:display-exception

You can also change the log level at runtime by using the log:set command. You can try these commands on your instance now by first setting the log level to DEBUG and then using grep to make sure that you can actually see the extra logging.
당신은 또한 log:set 커멘더를 사용함으로써 런타임환경에서 로그 레벨을 변경 할 수 있다. 당신은 먼저 DEBUG 레벨을 설정하고 그리고 당신이 실제 추가 로깅을 볼때 확인하기 위해 grep 을 사용함으로써 현재 당신의 인스턴스에 그 커멘트들을 사용할 수 있다.

karaf@root> log:set DEBUG
karaf@root> log:display | grep DEBUG

Afterwards, revert the log level to its original INFO value again with log:set.
나중에 log:set 을 사용하여 다시 원래의 INFO 값으로 로그 레벨을 되돌린다.

karaf@root> log:set INFO

...and there's a lot more (그리고 더 많은 것들이 있다)

These are obviously just a few examples of what the command shell is all about. There are a lot more commands in the shell to help you deploy, monitor, manage and troubleshoot the applications you're building with ServiceMix.
분명히 커멘트 쉘의 모든 것에 대해 단지 몇몇 예제만 있다. 당신이 ServiceMix에 빌드된 어플리케이션을 배포, 모니터링, 관리, 문제 해결하는 것을 됩기 위한 쉘에서의 커멘더 들이 더 많이 있다. 


'Apache ServiceMix' 카테고리의 다른 글

ServiceMix Quickstart ActiveMQ 추가하기  (0) 2014.07.30
ServiceMix Quickstart Camel 라우팅  (0) 2014.07.29
ServiceMix Quickstart 설치  (0) 2014.07.29
ServiceMix Quickstart 소개  (0) 2014.07.29
ServiceMix 문서  (0) 2014.07.28

+ Recent posts